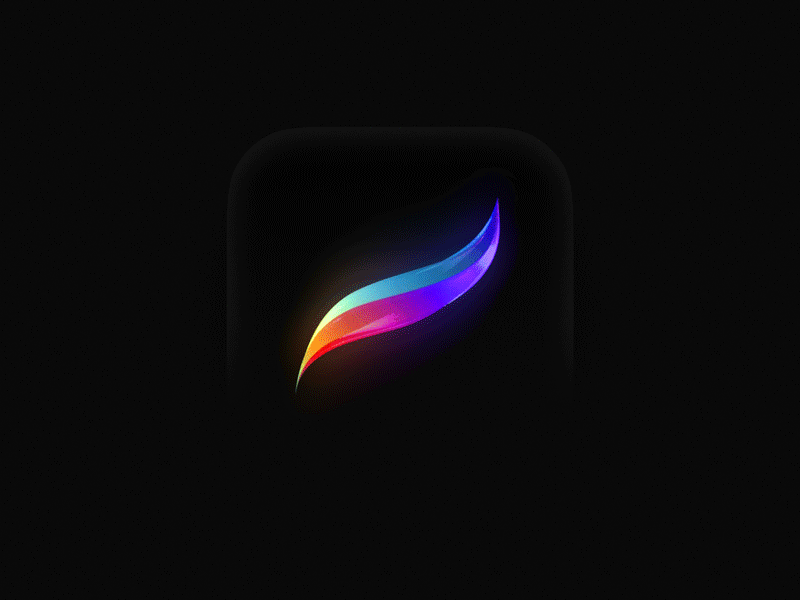
How-To Create an Animation: Your Creative Journey in Procreate
Welcome to a world of boundless creativity! Have you ever dreamed of bringing your art to life through animation? In this comprehensive tutorial, we invite you to explore the enchanting realm of animation using Procreate. Animation isn’t just about drawing; it’s about storytelling, expression, and endless possibilities. Whether you’re a seasoned artist, a graphic designer looking to expand your skills, or a curious beginner, this tutorial is your gateway to the captivating world of animation.
GRAPHICS DESIGN
Check out the original post Medium.com
We’ll begin with the fundamentals, guiding you through the essential tools and techniques within Procreate. From there, we’ll dive into a step-by-step practical project, where you’ll witness your creations come to life.
Are you ready to breathe life into your art? Join us on this exciting animation adventure, and let’s embark on a journey of imagination and creativity.
Starting Your Animation Canvas
Creating a New Canvas:
To embark on your animation journey, you’ll need the right canvas. Procreate offers a versatile canvas creation process that allows you to tailor your workspace to your needs.
Accessing the Canvas Creation Screen
Open Procreate on your device, and you’ll be greeted with the Gallery screen.
Tap the “+” icon located at the top right corner of the screen to create a new canvas.
Add a canvas
Choosing Canvas Settings
Procreate provides a variety of canvas presets, which are preconfigured settings for various purposes.
You can also opt to create a custom canvas by selecting “Custom Dimensions.”
Customizing Your Canvas
If you choose to create a custom canvas, you’ll need to specify details such as dimensions, color profile, time-lapse settings, and canvas properties.
Dimensions: Decide the width and height of your canvas in pixels.
Color Profile: Choose the color profile that suits your project (RGB for screen-based projects, CMYK for print).
Time-lapse Settings: Enable or disable time-lapse recording based on your preference.
Canvas Properties: Customize canvas names and other properties as needed.
Opening an Existing Canvas:
To continue working on an existing animation project, you can easily access your saved canvases in Procreate.
Choose an existing canvas
From the Gallery screen, scroll through your saved projects.
Tap the project you wish to continue working on, and Procreate will open it for you.
Tips and Best Practices:
When choosing canvas dimensions, consider the final output size of your animation. Larger dimensions offer more detail but may require more processing power.
Keep color profiles in mind, as they affect the appearance of your work on different devices or in print.
Time-lapse settings can be handy for recording your creative process, but they can also consume storage space. Use them selectively.
With your canvas ready, you’re now equipped to embark on your animation journey in Procreate. Stay tuned for the next steps, where we’ll explore the basic functions and animation features within Procreate.
Mastering Procreate’s Essentials
Actions:
In Procreate, the Actions menu is your control center for basic functions that can make your workflow smoother.
Actions Menu
Undo and Redo: If you make a mistake or want to reverse an action, simply tap the undo arrow (left-pointing) or redo arrow (right-pointing) in the top menu.
Copy and Paste: Select a portion of your artwork, tap “Copy,” and then “Paste” to duplicate it.
Transform and Warp: Access the Transform tool to resize, rotate, or distort selected elements in your canvas.
Clear and Fill: Clear allows you to erase everything on a layer, while Fill lets you quickly add color to selected areas.
Adjustments:
Procreate’s Adjustments menu empowers you to fine-tune your artwork.
Adjustments Menu
Brightness and Contrast: Adjust the overall brightness and contrast of your canvas to enhance visibility.
Filters: Explore various filters to add artistic effects, from blurs to sharpening and more.
Brushes Tool:
The Brushes tool is your artistic brush collection.
Brush Tool
Selecting Brushes: Tap the brush icon to access a wide array of brushes categorized by type. Choose the one that suits your creative vision.
Customizing Brushes: Adjust brush settings like size, opacity, and flow to achieve precise strokes and effects.
Pressure Sensitivity: Take advantage of the Apple Pencil’s pressure sensitivity for varying line thickness.
Smudge Tool:
The Smudge tool allows you to create smooth transitions between colors.
Smudge Tool
Brush Selection: Select a smudging brush that suits your needs.
Smudging Technique: Drag your finger or stylus across the canvas to blend colors or create smudged effects.
Eraser Tool:
The Eraser tool is essential for precise edits.
Eraser tool
Erasing Areas: Choose the Eraser tool and start erasing unwanted portions of your artwork.
Brush Selection: Just like with brushes, you can select different eraser brushes for specific effects.
Layer Picker:
Managing your artwork on layers is crucial for animation.
Layer Menu
Layer Creation: Add new layers to your canvas for different elements of your animation.
Adjustment: Change the opacity, blend mode, and other properties of individual layers.
Merging Layers: Merge layers when necessary to simplify your project.
Color Picker:
Understanding color is vital in animation.
Color picker
Selecting Colors: Use the Color Picker to choose colors from the spectrum or a predefined palette.
Color Palettes: Create custom color palettes to maintain consistency in your animation.
With these fundamental tools and functions mastered, you’re well-prepared to dive into the world of animation in Procreate. Stay tuned for the next steps, where we’ll explore animation-specific features and create a practical project.
Animating with Procreate’s Magic
Activating Animation Assist:
Before you dive into animation, you need to activate Animation Assist, a powerful tool in Procreate.
Enable Animation Assist
Open your canvas in Procreate.
Tap the wrench icon to access the Actions menu.
Select “Canvas” and then “Animation Assist.”
Toggle the switch to turn Animation Assist on.
Exploring the Animation Timeline
The Animation Timeline is your canvas for creating motion.
Animation settings
Understanding the Timeline Layout
The timeline is located at the bottom of your canvas, and it’s where you’ll manage your animation. It consists of frames, with the current frame highlighted.
Frames and Keyframes
Each frame represents a moment in your animation.
Keyframes are frames where you define specific changes or actions in your animation.
Animating Your Canvas:
Now that Animation Assist is active, let’s start creating animation frames.
Duplicate Frames
To create a new frame, tap the frame you want to duplicate, then tap the “Duplicate” button.
Make incremental changes to each frame to create animation.
Add New Frames
If you need additional frames, simply tap the “+” button in the timeline.
Onion Skinning:
Onion Skinning enhances your animation process.
Activating Onion Skinning:
Tap the Onion Skinning icon in the timeline.
Adjust the Onion Skin settings to see previous and upcoming frames as translucent images.
Onion skin frames
Onion skin opacity
Adding Sound and Music:
While not a core animation function in Procreate, you can enhance your animation by incorporating sound or music.
Importing Audio:
Import audio files into your project to synchronize sound with your animation.
With these animation-specific features mastered, you’re well-prepared to bring your creations to life. Stay tuned for the next steps, where we’ll guide you through a practical animation project.
Creating a Bouncing Ball Animation
Creating the ball
Project Introduction
Welcome to the heart of our animation tutorial — the practical project. In this section, you will bring a bouncing and rolling ball to life through animation. This hands-on experience will help you apply the skills you’ve learned so far and understand the magic of animation in Procreate.
Setting Up Your Canvas
Before we begin, ensure that you have a canvas suitable for animation. Follow the steps outlined in the “Creating or Opening a New Canvas” section to set up your workspace.
Sketching the Ball
Start by sketching a simple ball on your canvas. Remember, this is your starting point, so make sure the ball is clear and well-drawn.
Beginning the animation process
Creating the First Frame
The first frame of your animation will capture the ball at its highest point in the bounce.
Select the first frame in your Animation Timeline.
Using the Transform tool, position the ball at the top of the canvas.
Make sure the ball is the size and shape you desire.
Adding Keyframes
Keyframes define the significant moments in your animation. Add keyframes at key points in the ball’s motion.
Move forward in the timeline and add keyframes at intervals where the ball changes position.
Adjust the position and shape of the ball in each keyframe to create a sense of motion.
Animating the Ball
Now, it’s time to fill in the frames between the keyframes to make the ball’s motion smooth and realistic.
Create frames between the keyframes and adjust the ball’s position incrementally.
Continue this process until you have a sequence of frames that capture the ball’s entire bounce.
Fine-Tuning and Polishing
Refine your animation by fine-tuning the timing and making adjustments as needed.
Use Onion Skinning to visualize the previous and upcoming frames.
Pay attention to the spacing and timing of the frames to achieve a natural bounce.
Exporting Your Animation
Once you’re satisfied with your bouncing and rolling ball animation, it’s time to share your creation with the world.
Export your animation as a GIF or video file to showcase your work.
With your animation complete, you’ve taken your first steps into the exciting world of animation in Procreate. Congratulations!
Unleash Your Creative Potential with Procreate Animation
Wrapping Up the Journey
As we come to the end of this tutorial, let’s take a moment to recap the incredible journey you’ve embarked on. From setting up a canvas to breathing life into a bouncing ball through animation, you’ve delved into the world of Procreate animation with dedication and creativity.
The Power of Animation
Animation is a dynamic and captivating medium that adds a new dimension to graphic design and art. It allows you to tell stories, convey emotions, and engage your audience in ways that static images simply can’t. With animation, your creations come to life, leaving a lasting impact.
Benefiting Graphic Designers
For graphic designers, learning animation in Procreate opens doors to a world of possibilities. It equips you with the skills to create eye-catching visuals, dynamic advertisements, and interactive designs that stand out in a crowded digital landscape. Animation empowers you to take your design projects to the next level.
Empowering Digital Artists
Digital artists can elevate their craft by embracing animation. Your portfolio becomes a playground of creativity, featuring not only stunning illustrations but also animations that capture attention and immerse viewers in your artistic vision. Animation allows you to express ideas, concepts, and emotions in a dynamic and captivating manner.
A World of Possibilities
As you conclude this tutorial, remember that animation is just the beginning. Explore different projects, experiment with various styles, and continue to refine your skills. Animation is a limitless art form, and your creativity knows no bounds.
Now, I’d like to hear from you. What animation projects are you excited to work on next? How do you envision animation enhancing your creative endeavors? Share your thoughts and aspirations with us in the comments below, and let’s continue to inspire and learn from each other.
With animation, you have the power to transform your art and design into unforgettable experiences.
Thank you for joining us on this animation adventure, and may your creative journey be filled with endless possibilities.
Visit us at: Empire Graphics
Tools and apps used: Procreate & Procreate Brushes and Color Palettes